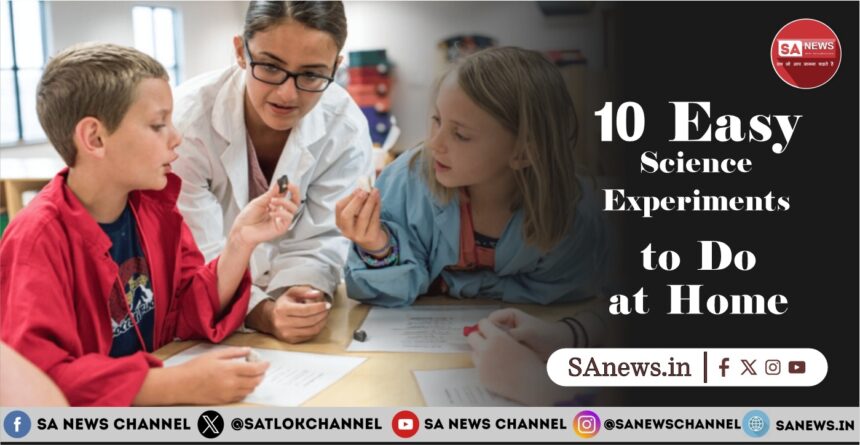
Doing fun science experiments is a great way to spark curiosity and learning in people of all ages. By trying out simple science experiments at home, you can have fun while learning. It’s a hands-on way to grasp different scientific ideas.
- The Magic of Density: Colorful Liquid Layers
- Volcano Eruption: Baking Soda and Vinegar Reaction
- Invisible Ink: Secret Messages with Lemon Juice
- Walking Water: Capillary Action in Action
- Homemade Slime: Polymers and Non-Newtonian Fluids
- Balloon Rocket: Newton’s Third Law Demonstration
- Crystal Growing: Making Beautiful Structures
- Static Electricity: Dancing Tissue Paper
- 10 Easy Science Experiments to Do at Home with Common Kitchen Items
- Conclusion
- FAQ
- What are some fun and easy science experiments to do at home?
- Are these science experiments suitable for children?
- What materials are needed for the science experiments?
- How long do the science experiments take to complete?
- Are the science experiments safe?
- Can I customize the science experiments?
- What is the age range for these science experiments?
- Can I do these science experiments with my family?
10 easy easy science experiments to do at home
These experiments are easy to follow and need little equipment. This makes them perfect for anyone. By diving into science through these experiments, you can learn more about scientific concepts and principles.
Key Takeaways
- Engage in fun and educational science activities at home.
- Conduct simple experiments with minimal equipment.
- Enhance understanding of scientific principles and concepts.
- Foster curiosity and learning through hands-on experiences.
- Make science accessible and enjoyable for all ages.
The Magic of Density: Colorful Liquid Layers
Explore the world of density with a simple yet mesmerizing experiment. It creates colorful liquid layers. This educational science activity is great for students and enthusiasts. It shows the concept of density in a visual way.
Materials You’ll Need
To do this experiment, you’ll need a few things:
- Vegetable oil
- Water
- Rubbing alcohol
- Food coloring
- A tall clear glass or container
- Salt or sugar for adding density
Step-by-Step Procedure
1. Preparing Your Liquids
Start by getting your liquids ready. Fill three containers with vegetable oil, colored water, and rubbing alcohol. Color the rubbing alcohol for a brighter look.
2. Creating the Layers
Pour the colored water into a tall glass first. Then add vegetable oil. Notice they don’t mix. Next, pour rubbing alcohol slowly. See how the liquids stack up.
3. Observing the Results
Watch as the liquids form clear layers because of their density. Try adding salt or sugar to the colored water. See how it changes the layering.
The Science Behind It
This experiment shows how density works. Density is mass per volume. Liquids with different densities stack up, with the densest at the bottom. It’s a cool way to see this science in action.
Safety Tips and Age Recommendation
Kids aged 8 and up can do this with adult help. Make sure it’s done in a well-ventilated area. Don’t drink any of the liquids. Adults should handle rubbing alcohol carefully.
Volcano Eruption: Baking Soda and Vinegar Reaction
The baking soda volcano represents a traditional science experiment. It shows a cool chemical reaction. It’s fun and educational, perfect for kids and adults.
Materials You’ll Need
To make this cool DIY science project, you’ll need a few things:
- Baking soda
- Vinegar
- A large container or plastic bottle
- Clay or modeling dough
- Food coloring (optional)
- Water
- A tray or plate to contain the mess
Step-by-Step Procedure
1. Building Your Volcano
First, shape clay or modeling dough around the plastic bottle. Make sure the bottle’s mouth is open.
2. Preparing the Reaction
Mix 2-3 tablespoons of baking soda with a bit of water. This makes a thick paste. Pour it into the bottle.
3. Creating the Eruption
Put vinegar in a separate container. Slowly add it to the bottle with the baking soda mixture. Watch as it erupts.
The Science Behind It
The baking soda and vinegar mix creates carbon dioxide gas. This gas accumulates pressure, leading to the eruption.It’s a cool example of a chemical reaction.
| Chemical | Formula | Role in the Reaction |
| Baking Soda | NaHCO3 | Reactant |
| Vinegar | CH3COOH | Reactant |
| Carbon Dioxide | CO2 | Product |
Edit
Delete
Safety Tips and Age Recommendation
Kids aged 6 and up can do this experiment with adult supervision. Make sure it’s done in a well-ventilated area. Also, avoid getting the mixture on skin or in eyes.
Invisible Ink: Secret Messages with Lemon Juice
Discover the secrets of espionage with a fun science experiment: Invisible Ink using lemon juice. This kid-friendly science experiment turns your kitchen into a spy’s den.
Materials You’ll Need
- Lemon juice
- Water
- A small bowl
- A cotton swab or a small brush
- White paper
- A light bulb or a candle
Step-by-Step Procedure
1. Preparing Your Ink
Combine equal portions of lemon juice and water in a small bowl. This will be your invisible ink.
2. Writing Your Message
Dip a cotton swab or small brush in the lemon juice mix. Write your message on white paper. Let it dry completely.
3. Revealing the Secret
To see your hidden message, hold the paper near a light bulb or candle. The heat will darken the lemon juice, making your message appear.
“The art of espionage has been a part of human history for centuries, with invisible ink being one of its most intriguing tools.”
— History of Espionage
The Science Behind It
The magic of invisible ink comes from lemon juice’s acidic nature. When heated, it darkens, becoming visible on paper. This happens because the sugars in lemon juice caramelize when heated.
| Component | Role in the Experiment |
| Lemon Juice | Acts as the invisible ink, darkening when heated. |
| Heat | Causes the lemon juice to caramelize, revealing the message. |
Safety Tips and Age Recommendation
Kids aged 8 and above can do this experiment with adult supervision. Make sure kids handle the candle or light bulb safely to avoid burns.
By following these steps, you can do easy science experiments for kids at home. It’s a great way to encourage a love for science and discovery.
Walking Water: Capillary Action in Action
Capillary action is a key scientific principle seen in the ‘Walking Water’ experiment. It’s fun for kids and adults to do. This principle helps us understand how water moves in plants and other materials.
Materials You’ll Need
To do the ‘Walking Water’ experiment, you need a few things:
- Three or more glasses or cups
- Water
- Food coloring (different colors)
- Paper towels
Step-by-Step Procedure
1. Setting Up Your Glasses
Begin by lining up the glasses. Fill every other glass with water. Add a few drops of food coloring to each filled glass to make it stand out.
2. Creating the Bridge
Cut a paper towel into strips that span from one glass to the next. Place one end in a filled glass and the other in an empty one.
3. Watching the Water Walk
Watch over the next few minutes. You’ll see the colored water move through the paper towel into the empty glasses. It will spread the colored water evenly across the glasses.
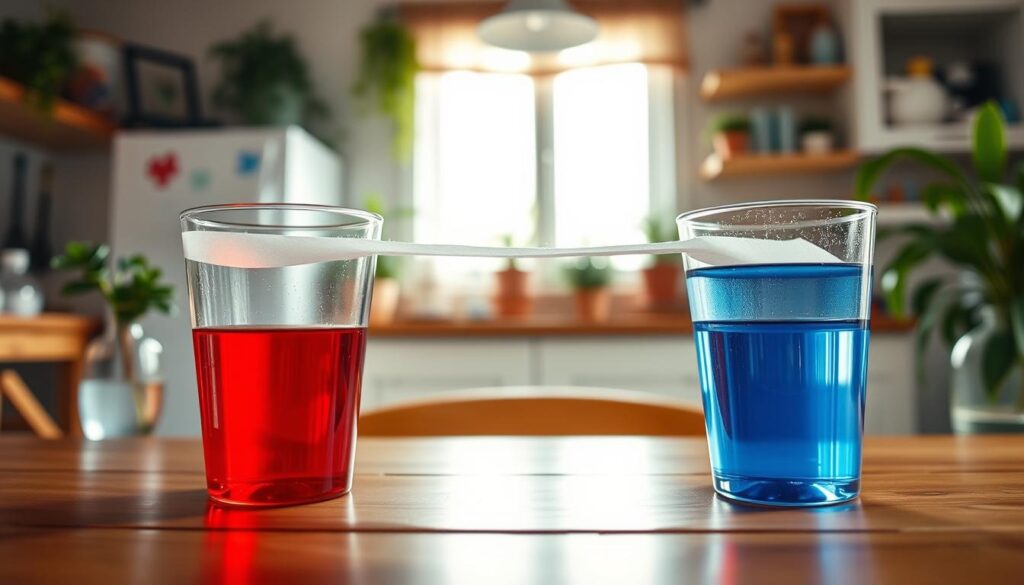
Walking Water Experiment
The Science Behind It
The ‘Walking Water’ experiment shows capillary action. This is when water moves through a material like paper towels. It happens because of two forces: adhesion and cohesion. Adhesion is when water molecules stick to the paper towel. Cohesion refers to the phenomenon where water molecules adhere to one another.
| Force | Description | Role in Capillary Action |
| Adhesion | Attraction between water molecules and paper towel material | Helps water to climb up the paper towel |
| Cohesion | Attraction between water molecules | Contributes to the continuous flow of water |
Safety Tips and Age Recommendation
This experiment is good for kids aged 6 and up, with adult supervision. Make sure to handle the materials carefully. Also, avoid spilling water on surfaces that could get damaged.
Homemade Slime: Polymers and Non-Newtonian Fluids
Making homemade slime is a fun DIY science experiment. It introduces you to polymers and non-Newtonian fluids. This activity is both entertaining and educational, making science easy and fun.
Materials You’ll Need
To make homemade slime, you’ll need the following materials:
- 1 cup of Elmer’s White Glue
- 1/2 cup of warm water
- 1 teaspoon of borax
- Food coloring (optional)
- Glitter or decorations (optional)
Step-by-Step Procedure
Follow these steps to create your homemade slime:
1. Mixing the Base Ingredients
In a bowl, mix 1 cup of Elmer’s White Glue with 1/2 cup of warm water. Stir until the glue is fully dissolved. If you want to add color, now is the time to add a few drops of food coloring.
2. Adding the Activator
In a separate bowl, combine 1 teaspoon of borax with 1 cup of warm water.Stir until the borax is fully dissolved. This solution turns your glue mixture into slime.Gradually incorporate the borax solution into the glue mixture while continuously stirring.You’ll start to see the slime come together.
3. Kneading Your Slime
After the slime has been created, remove it from the bowl and knead it using your hands. This step is important as it removes any lumps and makes the slime smooth and stretchy.
The Science Behind It
The homemade slime experiment teaches about polymers and non-Newtonian fluids. The glue contains polymers, which are long chains of molecules. When you add the borax solution, it creates cross-links between these polymer chains, resulting in a sticky and stretchy substance. The slime behaves as a non-Newtonian fluid because its viscosity changes under different conditions, such as when you apply pressure or stretch it.
“The study of non-Newtonian fluids is a fascinating area of research that has numerous practical applications, from industrial manufacturing to biomedical devices.”
Safety Tips and Age Recommendation
This activity is suitable for children aged 6 and above, provided they are supervised by an adult. Here are some safety tips to keep in mind:
- Make sure to wash your hands before and after handling the slime.
- Refrain from consuming the slime or allowing it to come into contact with your eyes.
- If you have sensitive skin, consider wearing gloves while handling the slime.
By following these steps and safety guidelines, you can enjoy a fun and educational DIY science experiment that is perfect for kids and adults alike.
Also Read: The Best Ways to Boost Your Child’s Immunity Naturally
Balloon Rocket: Newton’s Third Law Demonstration
The ‘Balloon Rocket’ experiment brings Newton’s Third Law to life. It’s a simple yet fascinating stem experiment that shows action and reaction forces.
Materials You’ll Need
To do this fun hands-on science project, you’ll need a few things:
- Balloons
- Straws
- String or fishing line
- Tape
- Scissors
Step-by-Step Procedure
Here’s how to set up and launch your ‘Balloon Rocket’ experiment:
1. Setting Up Your Launch Line
Stretch a string or fishing line across a room or hallway. Make sure it’s tight between two fixed points. This will be your balloon rocket’s launch line.
2. Preparing Your Rocket
Blow up a balloon and attach a straw to it with tape. Then, thread the string through the straw, making sure it’s secure.
3. Launching the Experiment
Let the balloon go, and watch it move along the string. The air escaping pushes it forward, showing Newton’s Third Law in action.
The Science Behind It
The ‘Balloon Rocket’ experiment shows Newton’s Third Law of Motion. It says for every action, there’s an equal and opposite reaction. When air is released from the balloon, it pushes the air around it forward (action). Then, the air pushes the balloon backward (reaction), making it move along the string.
Balloon Rocket Experiment
Safety Tips and Age Recommendation
This experiment is good for kids aged 8 and up, with adult help. Make sure the area is clear and the balloon is well attached to the straw to avoid accidents.
Crystal Growing: Making Beautiful Structures
You can grow your own crystals with just a few easy-to-find materials. This fun experiment teaches kids about chemistry and geology. It’s a great way to see science in action.
Materials You’ll Need
To start your crystal growing adventure, you’ll need the following materials:
- Boiling water
- Food coloring (optional)
- A super-saturated solution of a substance like alum or copper sulfate
- A jar or container
- A string or a paper clip
- A pencil or stick
Step-by-Step Procedure
Growing crystals involves a few simple steps:
1. Creating Your Solution
Start by dissolving a lot of your chosen substance (like alum or copper sulfate) in boiling water. This makes a super-saturated solution. You can add food coloring to make your crystals colorful.
2. Setting Up the Growing Environment
Pour the solution into a jar. Then, suspend a string or a paper clip into the solution. This will be the nucleus for your crystal. Place a pencil or stick across the jar’s top, hanging the string or paper clip inside.
3. Watching Crystals Form
Cover the jar with a cloth to keep dust out. Let it sit in a quiet, undisturbed place. As the solution cools and evaporates, crystals will form on the string or paper clip.
The Science Behind It
The crystal growing process is based on saturation. A super-saturated solution has more dissolved substance than it can hold. As it cools or evaporates, the substance precipitates out, forming crystals around the nucleus.
“The formation of crystals is a beautiful example of how matter can organize itself into structured and symmetrical patterns under the right conditions.”
Safety Tips and Age Recommendation
This experiment is for kids aged 8 and above, with adult supervision. Handle the super-saturated solution carefully, as it may be hot. Make sure the area is well-ventilated, mainly when using copper sulfate.
By following these steps and safety guidelines, kids can enjoy a fun and educational science experiment. It introduces them to the fascinating world of crystal formation.
Static Electricity: Dancing Tissue Paper
Static electricity makes tissue paper dance in a simple experiment. It’s a fun way to learn about static electricity.
Materials You’ll Need
- Tissue paper (small pieces)
- A balloon or a plastic rod
- A dry cloth or your dry hair
Step-by-Step Procedure
1. Preparing Your Materials
RStart by ripping the tissue paper into tiny fragments.efrain from consuming the slime or allowing it to come into contact with your eyes. This makes it easier for static electricity to lift them.
2. Creating Static Charge
Rub the balloon or plastic rod against a dry cloth or your dry hair. This creates a static charge. The balloon or rod becomes negatively charged.
3. Observing the Effect
Now, bring the charged balloon or rod near the tissue paper. Watch how the tissue paper reacts to the static electricity.
The Science Behind It
Static electricity happens when objects touch and electrons move. This makes one object positive and the other negative. In this experiment, the negatively charged balloon or rod pulls the positively charged tissue paper towards it. This makes the tissue paper ‘dance’ towards the balloon or rod.
Safety Tips and Age Recommendation
This experiment is good for kids aged 6 and up, with adult supervision. Make sure it’s done in a dry place. Moisture can mess with the static electricity.
| Age Group | Safety Precaution |
| 6-8 years | Adult supervision required |
| 9-12 years | Can conduct with minimal supervision |
10 Easy Science Experiments to Do at Home with Common Kitchen Items
You don’t need a lab to do cool science experiments. Your kitchen has everything you need. You can make fun and educational science activities for kids and adults with items you already have.
Materials You’ll Need
Most of the materials for these experiments are found in your kitchen. You’ll need:
- Baking soda
- Vinegar
- Lemon juice
- Food coloring
- Kitchen towels
- A few simple household items like paper towels and straws
Step-by-Step Procedure
Now, let’s go through the steps of one of these experiments.
1. Setting Up Your Experiment
First, collect all your materials and arrange them on a clean surface. For the baking soda and vinegar experiment, make a mini-volcano with clay or paper mache.
2. Conducting the Test
Pour baking soda into the volcano, then add a few drops of food coloring. Slowly add vinegar to the mix. Watch as it erupts.
3. Analyzing the Results
Talk about the chemical reaction between baking soda and vinegar. Explain how this reaction caused the eruption.
Here’s a summary of the experiment’s key steps and findings in the table below:
| Step | Action | Observation |
| 1 | Pour baking soda into the volcano | Initial setup |
| 2 | Add vinegar to the mixture | Eruption occurs |
| 3 | Analyze the chemical reaction | Understand the science behind it |
The Science Behind It
The interaction of baking soda and vinegar constitutes a chemical reaction. It produces carbon dioxide gas. This reaction is:
NaHCO3 + CH3COOH → CO2 + H2O + CH3COONa
The CO2 produced creates pressure, causing the eruption.
Safety Tips and Age Recommendation
These experiments are good for kids aged 8 and up, with adult supervision. Make sure the area is clear of breakable items. Also, remind kids not to taste any of the materials.
Conclusion
Doing 10 easy science experiments at home is a great way to spark a love for learning in kids. These experiments are fun and help kids understand complex ideas in a hands-on way. They make learning both enjoyable and informative.
Trying out these experiments helps kids see the world in a new light. The DIY and kid-friendly science projects in this article are perfect for encouraging curiosity and critical thinking. They help kids explore the wonders of science.
Science experiments for kids are not just fun; they’re also educational. By adding these activities to daily life, parents and teachers can inspire a lifelong love for science. So, start with these 10 easy experiments at home and watch your child’s curiosity soar.
FAQ
What are some fun and easy science experiments to do at home?
You can try Colorful Liquid Layers, Volcano Eruption, and Invisible Ink at home. Also, Walking Water, Homemade Slime, Balloon Rocket, Crystal Growing, and Static Electricity are fun. They’re perfect for DIY and kid-friendly science.
Are these science experiments suitable for children?
Yes, these experiments are great for kids. But, make sure an adult is there to help. This is because some use household chemicals or sharp objects. It’s a fun way to learn and do hands-on projects.
What materials are needed for the science experiments?
You’ll need different things for each experiment. But, most are easy to find at home or in stores. They help make simple and STEM experiments.
How long do the science experiments take to complete?
Each experiment takes about 30 minutes to an hour. This makes them perfect for a fun, educational afternoon.
Are the science experiments safe?
Yes, they’re safe if you follow the safety tips. This ensures a fun and safe experience for all.
Can I customize the science experiments?
Yes, many experiments can be changed to fit your needs. This lets you make your own unique DIY and simple science projects.
What is the age range for these science experiments?
Most experiments are for kids aged 6 and up. They’re great for learning and fun science activities.
Can I do these science experiments with my family?
Yes, these experiments are a great way to bond with your family. They create lasting memories while enjoying science and STEM together.